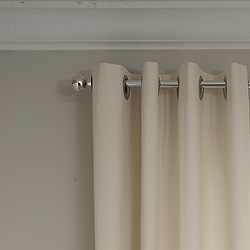
Drapery will quickly transform a room even though people avoid it because of the price tag. There is no way around it, window treatments are expensive. Just like with everything there is a huge range in costs, depending on fabric, hardware and custom vs. ready-made. No matter which route you take the end result is well worth the journey!
I am a fan of very simple panels. I pictured below my two favorite styles; Grommet and Flat Panel.
|
 This is drawing of a grommet style panel (thanks Calico Corners for the drawing). This is a great option for ready made panels because they fall nicely and the hardware is sewn into the fabric so you don't have to deal with rings. This is a great look for a more modern, transitional room.  Here are some drapery design tips and ideas...  To get a custom look without a custom price tag this is simply two panels in two different colors per window (when you buy ready-made you typically need two panels per side, so four panels per window if you have large windows). I love what the pop of orange does for this room!  Those of you that can sew or know someone that has that amazing talent (I have serious envy of people that can sew) this is an easy way to create a unique custom drapery. Take a white ready-made panel and sew on a trim, ribbon, or fabric border. Location, Location, Location  A common mistake is to hang the drapery rod right above the window. I always install that puppy right below the crown molding or as close to it as possible (if there isn't molding than a few inches down from the ceiling). Making this simple change will make a huge difference! It makes the window look bigger and the ceiling look higher. Notice the rod placement...   |
| (Decorpad image 1 here , image 2 here, image 3 here, image 4 here, image 5 here) Here are some great ready-made options..  West Elm- Linen Cotton Grommet Panel |


